Application Security Overview | OutSystems Evaluation Guide

Ultimately, how do you measure an app's success? In truth, adoption is the name of the game. Internal adoption of an employee-only app is the first step. The height of success comes when there is external demand for some (or all) of your app's functionality, and you want as many people to make use of it as possible. However, this means exposing it to the outside world. And unlike when it’s an employee-only app, you are no longer operating in an environment you control.
Communications back and forth with your application programming interface (API) need to be secured and authenticated. That's where OAuth 2.0, the industry-standard protocol for authorization, comes in.
In this article, I’ll show you how to use OAuth 2.0 to secure OutSystems APIs.

The Requirements
You’ll need an easy-to-install core component, with as few dependencies as possible, that provides:
- A user interface for registering and authorizing a third-party application, including the definition of scope
- REST API for requesting, validating, and refreshing tokens
- Redirection mechanism for the page requests
- Secure storage of the tokens and access codes
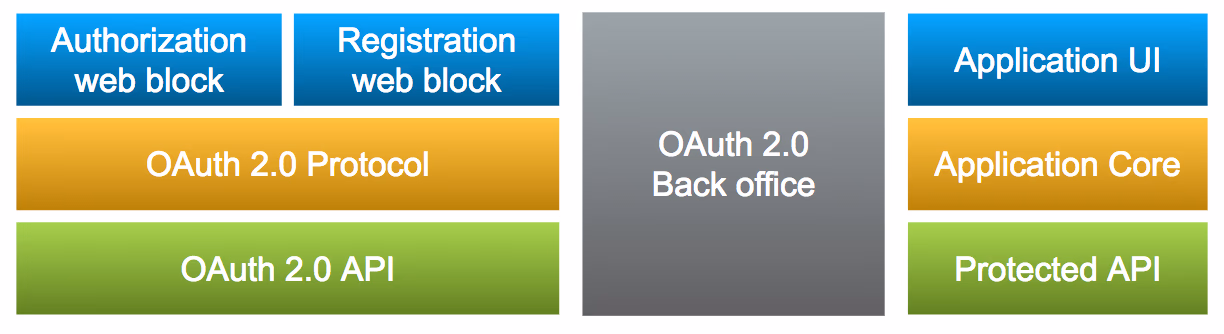
The Architecture
On the OutSystems side, there are three distinct blocks. The component itself, a back-office implementation, and the application with the API you want to protect.
Building It
Start by creating the data structures that will hold all this information:
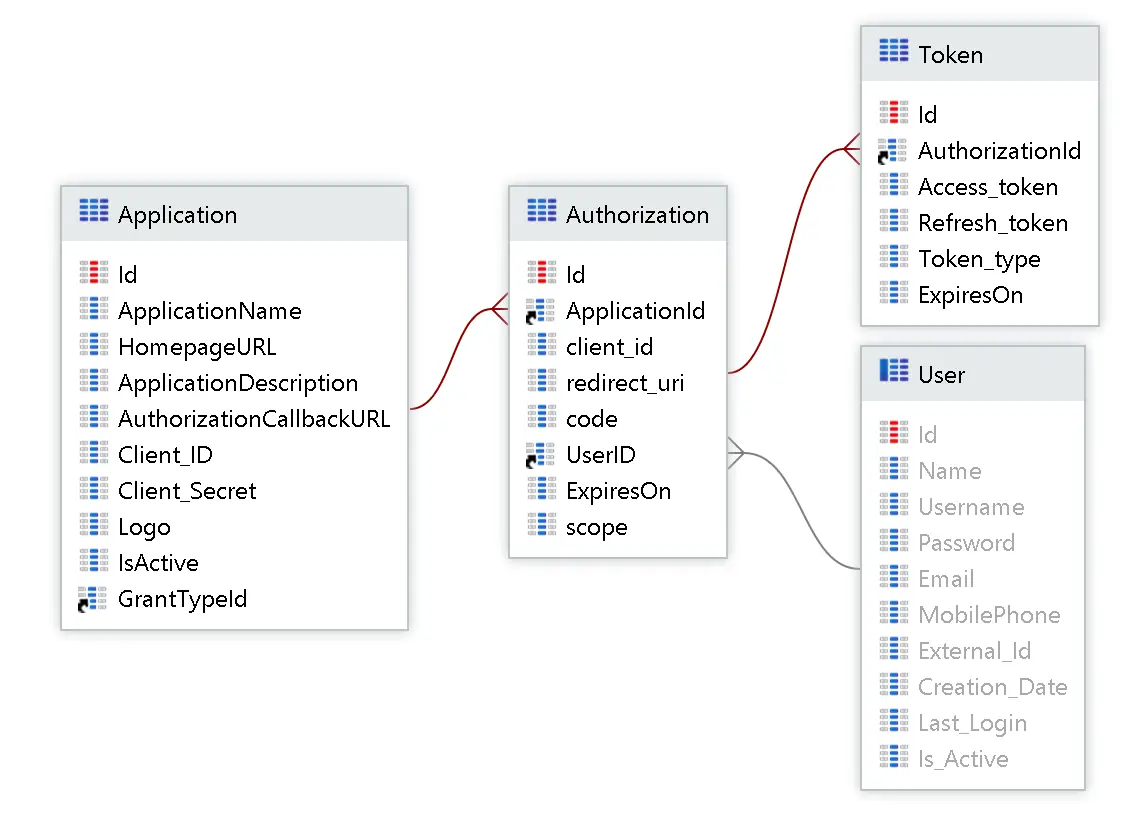
Here we have applications, authorizations that represent each user’s consent for each application, and a token for each authorization.
Registration and Authorization
The next step is to create the back office, which has pages that manage the registration and another page to handle the incoming requests and authorize the app. As a result, users can ultimately decide on the scope and accept the sharing of data on their behalf.
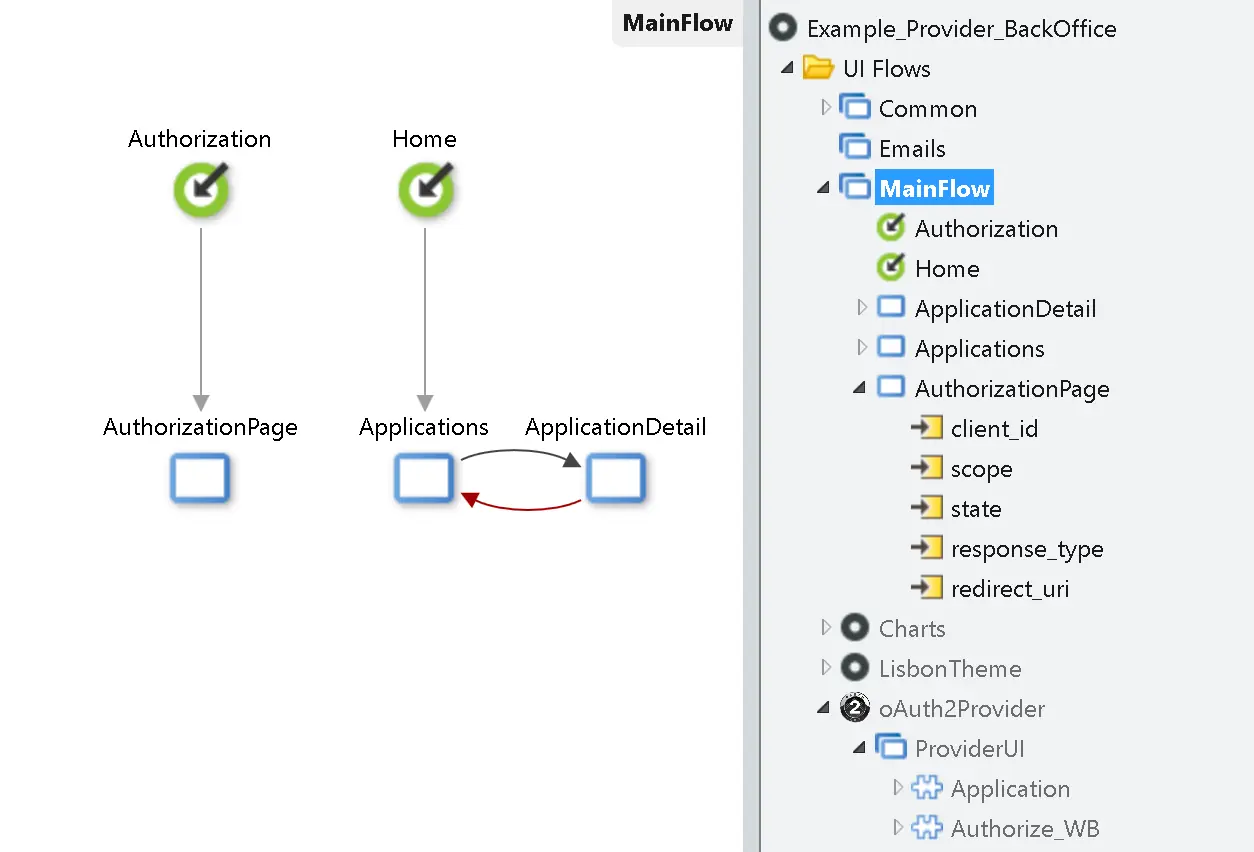
All the functionality is already built in the reusable web blocks.
The Token Request, Refresh, and Validate
The same REST entry point is used for requesting and refreshing the token, depending on the grant type. As for authentication, it must implement a basic format with Base64 encoding client_id:client_secret.
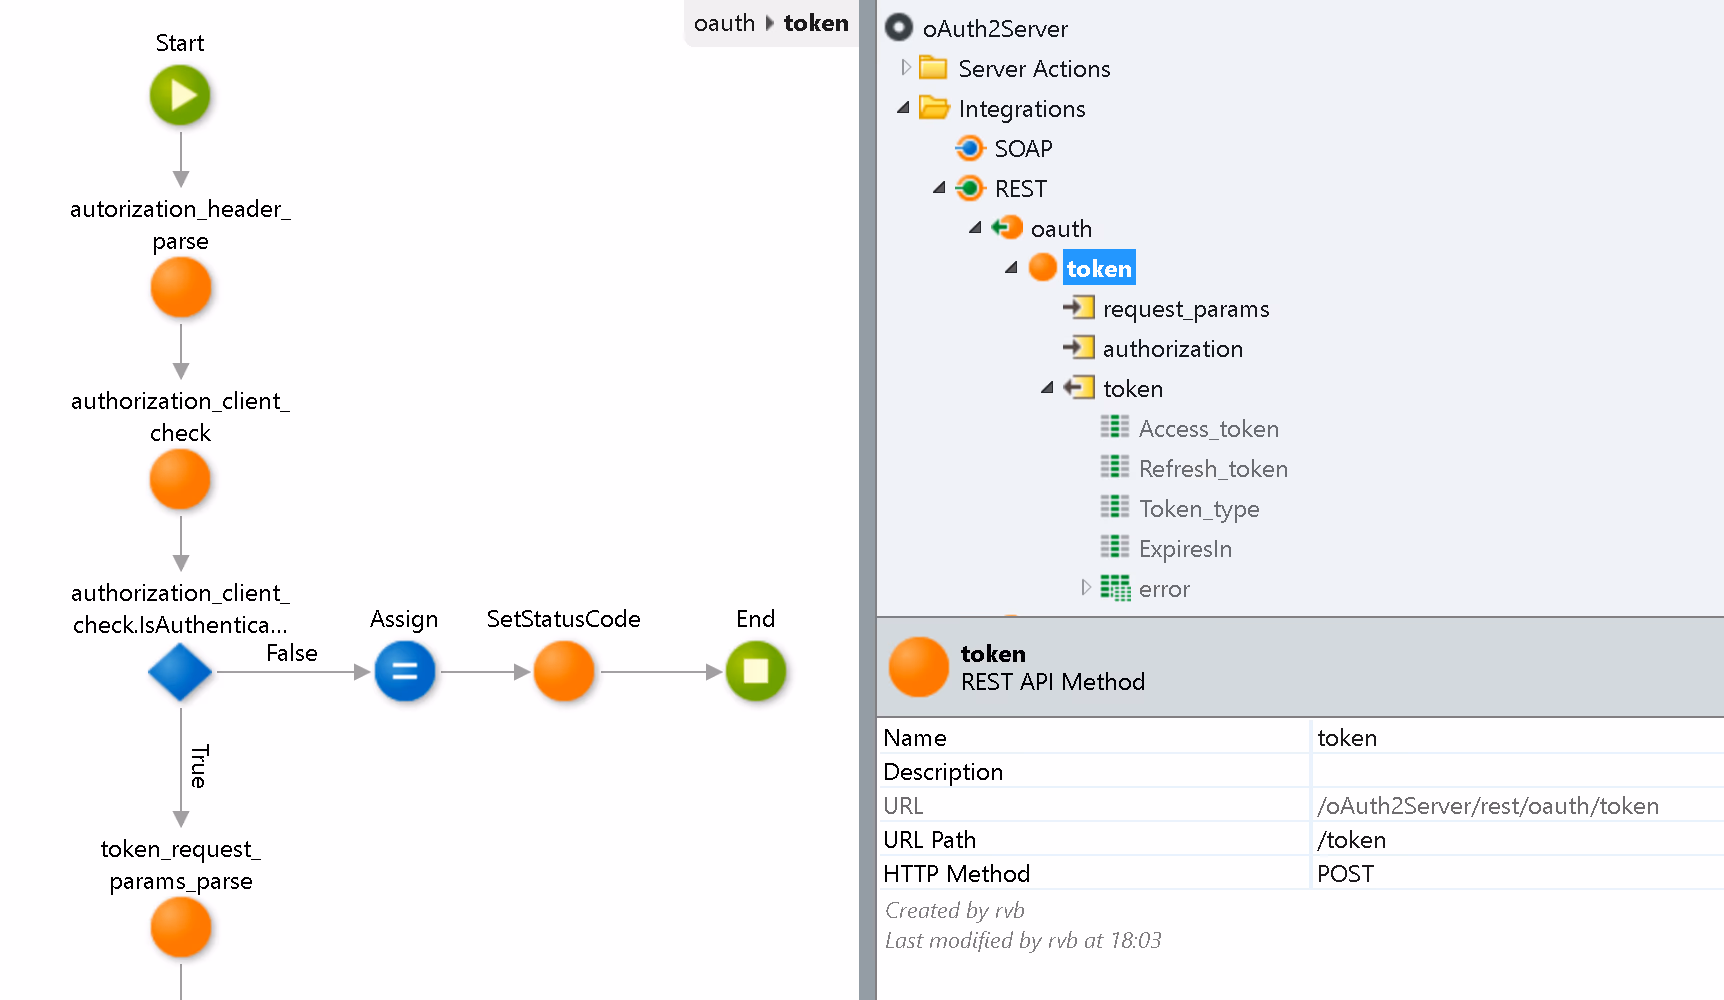
The validation entry point is implemented as a separate API because it should only be accessible from the internal network.

This is all that’s needed to secure the APIs.
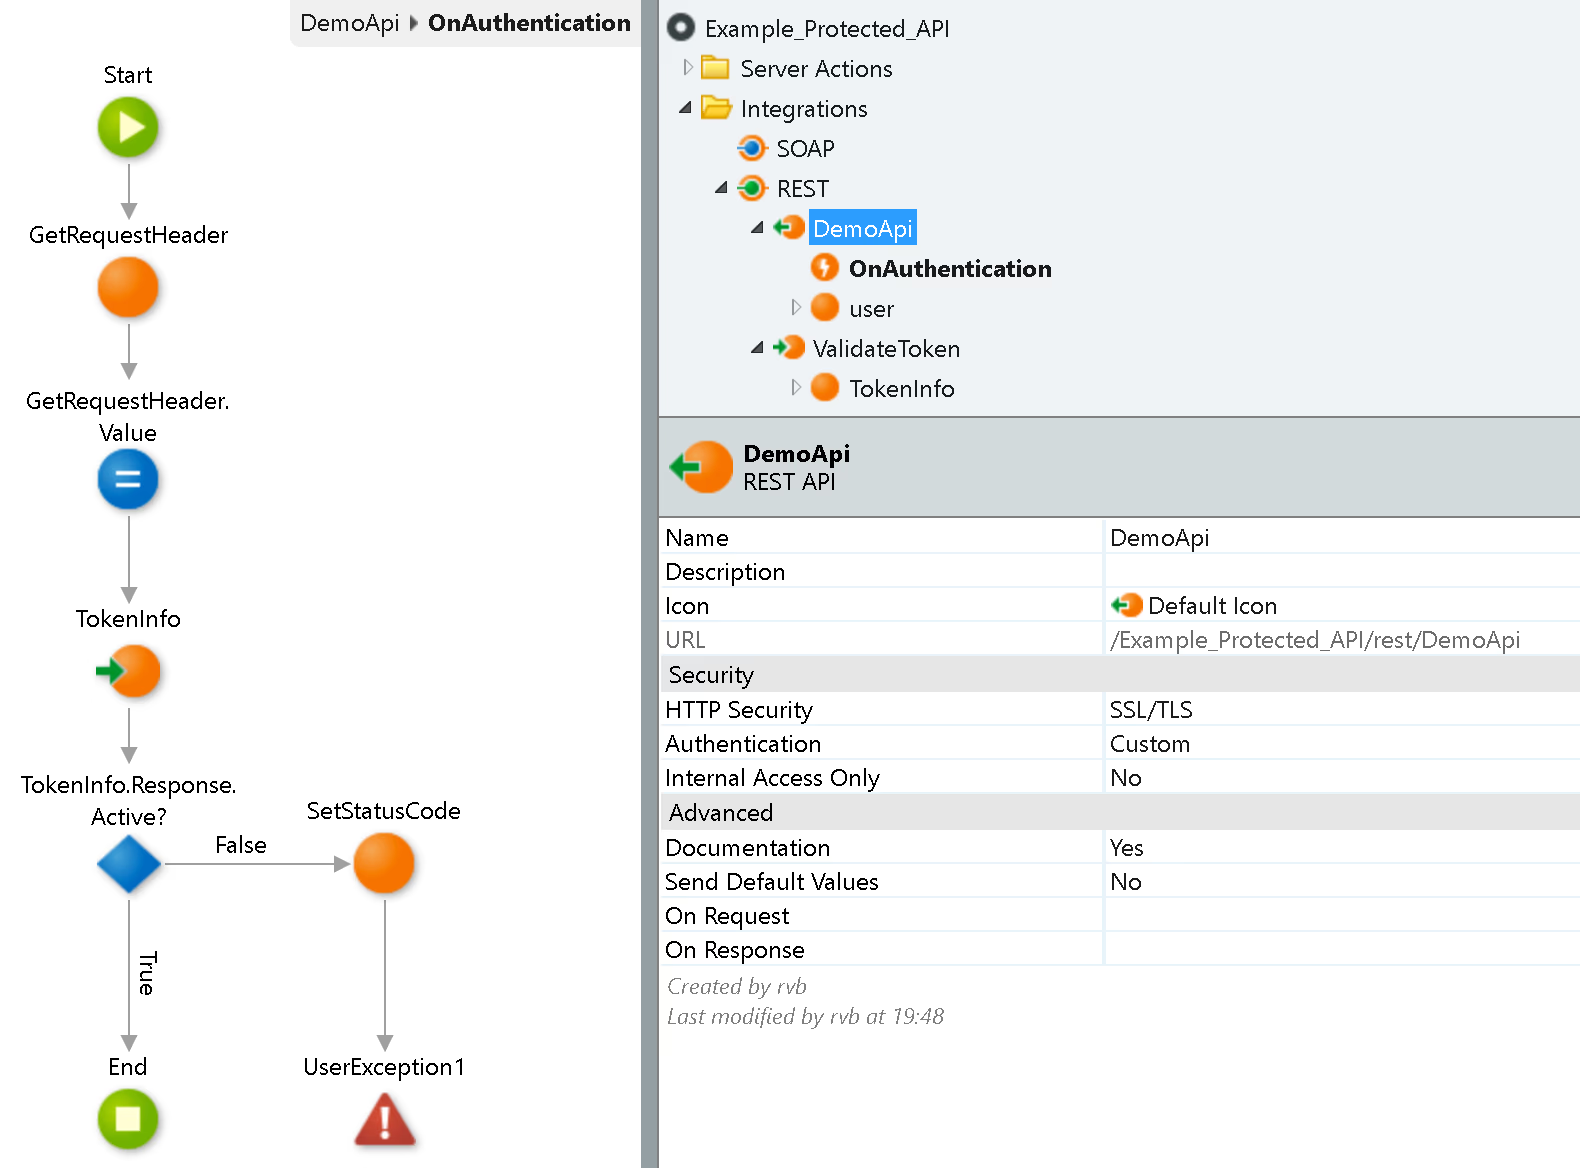
The Protected API
In the API, you should implement the REST for token validation from the OAuth2Server.

Then, use it in the authentication event for your API.
Third-Party Client Application
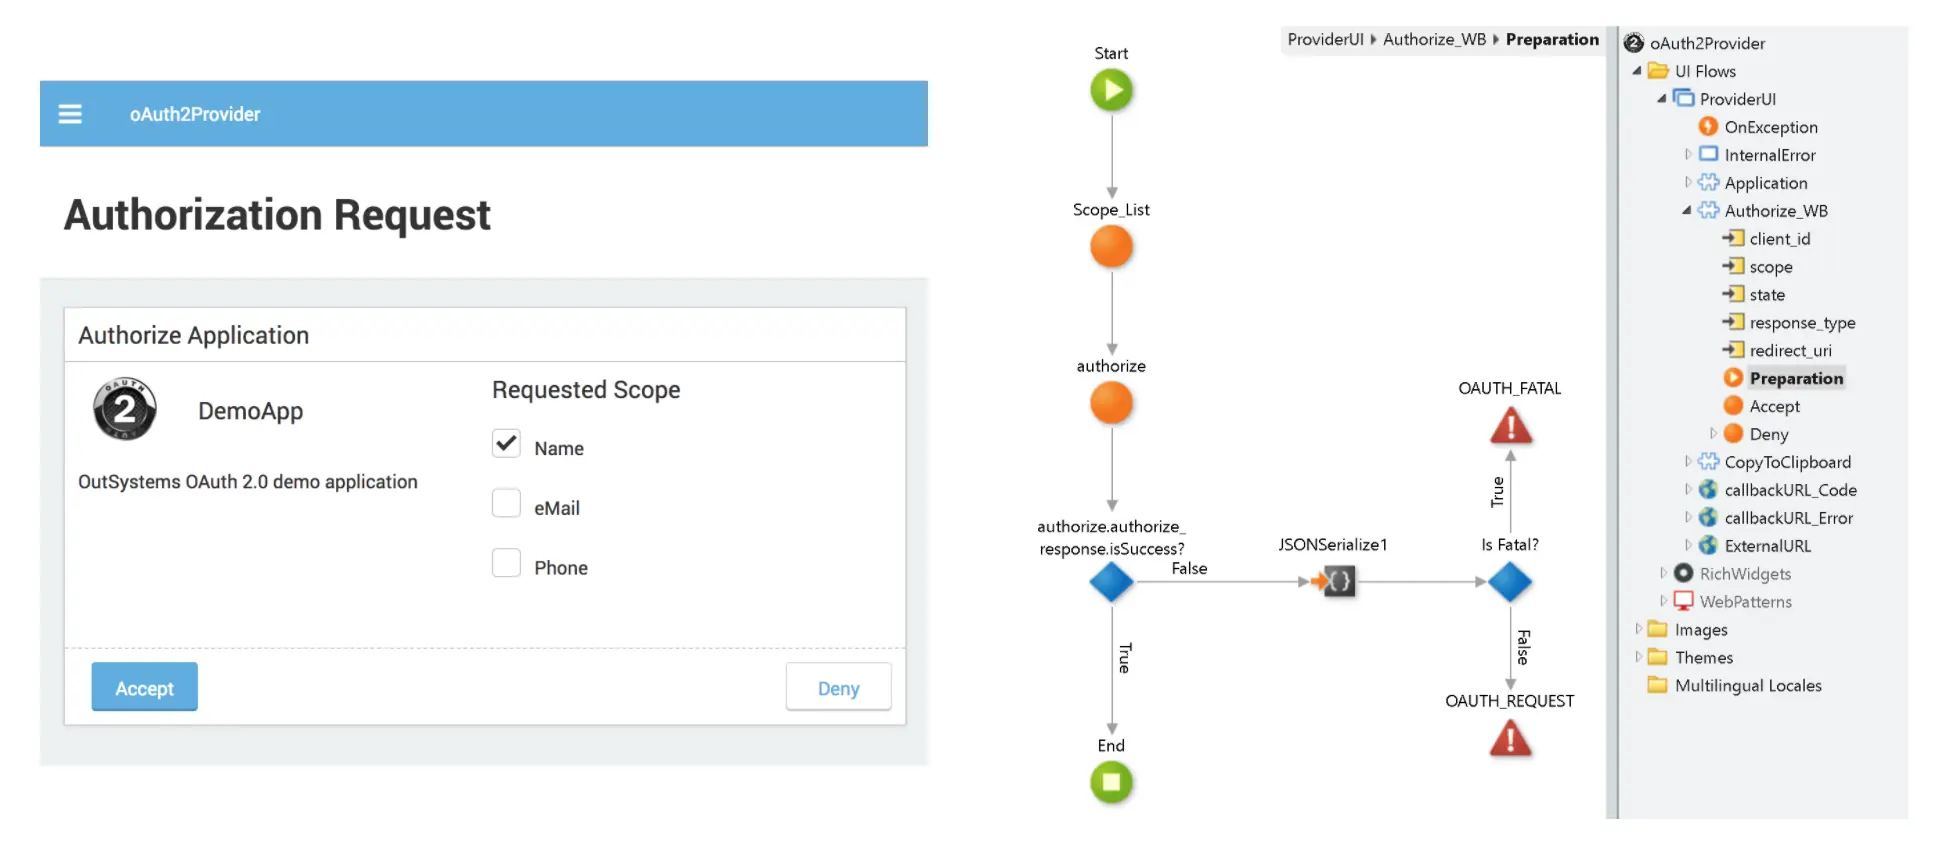
First, the third-party client application should implement the registration, whereby it gets the client ID and client secret and specifies the callback URI that will handle the return of the code.
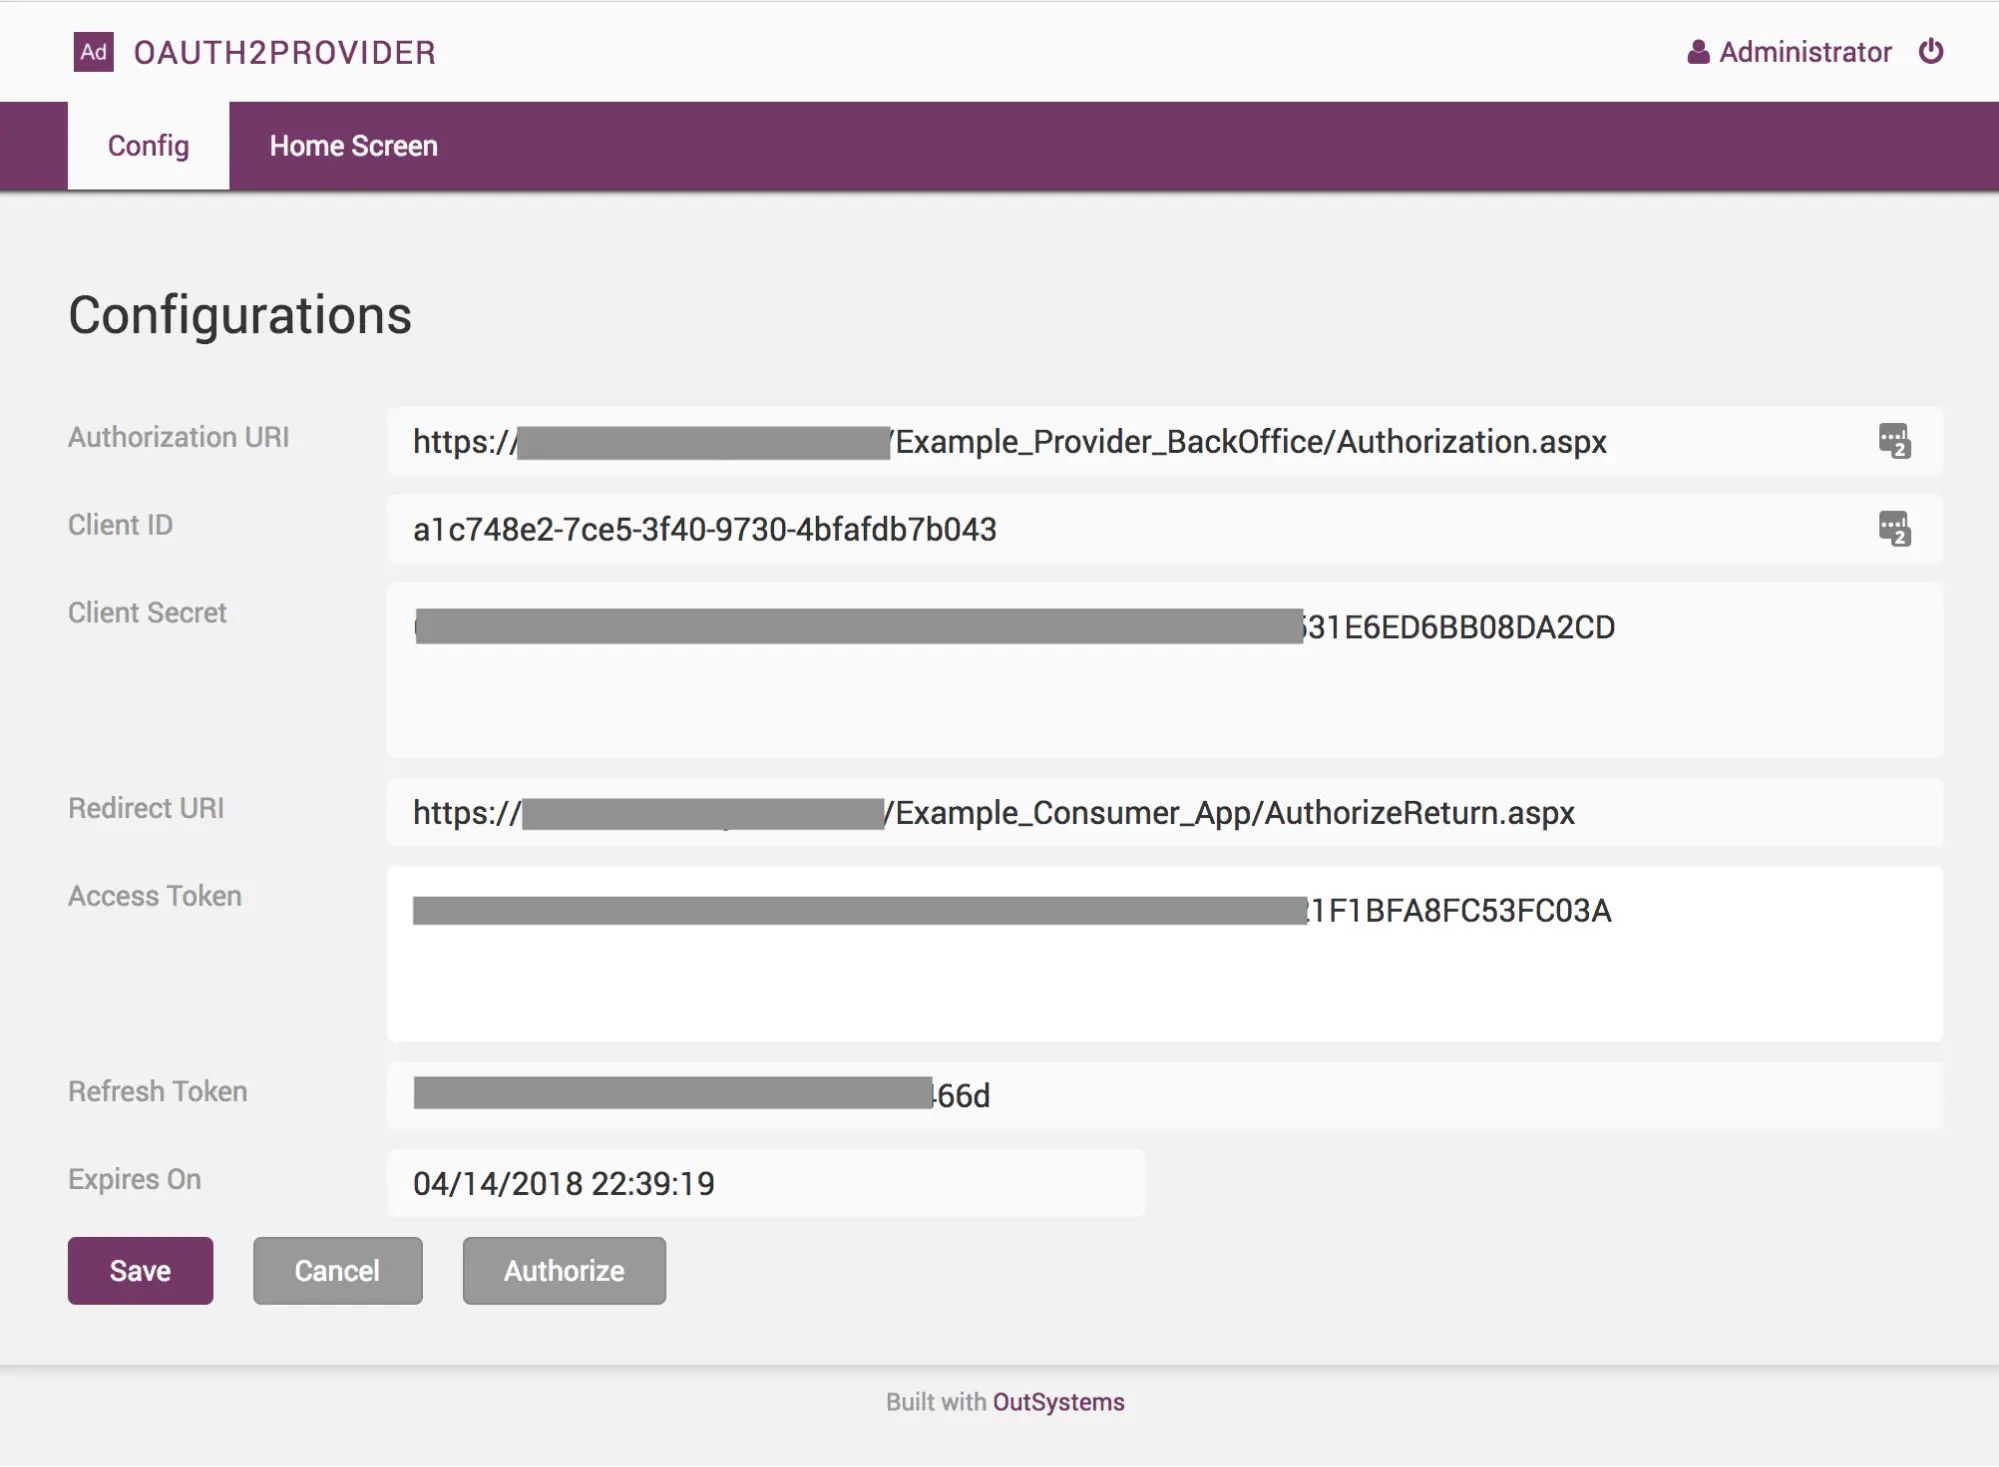
The next step is an authorization request to users, who will be redirected to the authorization page to confirm the scope, which will also authenticate them. Finally, the provider will redirect the users to a page to complete the token request.

The application should then store the token securely and use it as an authenticator for every API request. If the token expires, the application can also use the refresh token and request a new one for authentication.

Check out the Forge component and go build those apps—and secure those APIs.


