How to use client actions for client side logic in OutSystems?
Welcome to the third post in the OutSystems 101 series! The objective of this series is to help developers who use languages and frameworks like React, Angular, or .NET quickly learn core concepts in OutSystems. This post will focus on the heart of app functionality: logic and actions.
If you’ve been following along, we’ve already covered data and user interfaces (UI) in OutSystems. I recommend checking out the previous posts on data and user interfaces in this series if you haven’t yet.
Knowledge of programming concepts is helpful for this series. If you would like a more comprehensive deep dive, OutSystems provides a robust library of training materials for free online here.
Throughout the series, we’ll work through examples based on a sample events platform application. If you’d like to build along, create a free OutSystems account, set up a personal environment, and install the development environment, Service Studio. (Check out the Getting Started guide here.)
Logic in OutSystems
In OutSystems, logic is implemented through actions, which handle everything from data interactions and user inputs to calling external APIs and managing complex business rules. This post will guide you through the basics of creating and using actions in OutSystems, enabling you to build powerful and responsive applications with ease.
Actions can exist on the client or the server, depending on what makes sense for the functionality you’re building. We’ll review both of these, when it makes sense to use them, and how to create powerful logic flows using the visual interface in OutSystems.
When working with actions, it’s also important to know when they will trigger. We’ll also learn about events to better understand the relationship between logic and the user interface in your apps.
Client actions
Client actions, indicated by an orange circle outline in Service Studio, are pieces of logic executed on the client side of your application. They handle tasks like updating the UI or responding to user input.
Most client actions are defined at the screen level, meaning they are scoped to a specific page of your app. You can also create actions at the application level if you plan to reuse the logic for multiple screens.
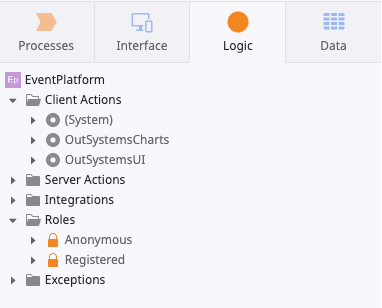
You can view and create new client actions at the app level from the Logic tab in Service Studio.
An action is essentially a function in JavaScript. Like a function, actions can have input parameters, local variables, and output parameters (like return values). Also like JavaScript functions, actions have a concept of scope. This means that the logic in the action is dependent on where the action is defined.
Client actions, because they are defined at the app level, can be used across the client side of the application. This includes in other client actions, as well as in actions defined at the screen level.
Screen actions
Screen actions are a type of client action that are scoped to a specific screen. They also do not have output parameters.
You can view and create screen actions with the Interface tab by expanding the current screen. OutSystems automatically creates screen actions for you when you add widgets to the UI that involve user interaction, such as a button or text input. OutSystems understands the relationship between logic and UI in your application and helps take the guesswork out of ensuring your app is reactive and ready for user interaction.
We can see that the screens we created in the previous blog posts already have screen actions created: “SaveDetail,” “OnPaginationNavigate,” and “OnSearch.”

Screen actions are typically triggered when the user interacts with a piece of UI or by screen events, which we’ll discuss shortly.
Action flows
Let’s dig into one of these actions to learn more. Double-click on “SaveDetail” to open the action flow.

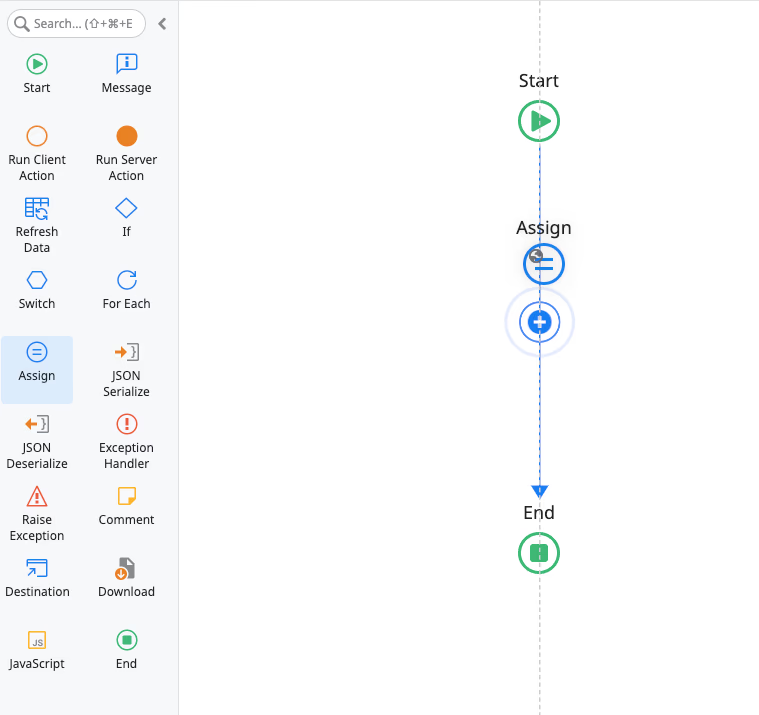
This may seem confusing at first! Thinking about code visually can take some getting used to, but once you learn some basic icons, you’ll be able to read a flow like this just like you do with lines of code.
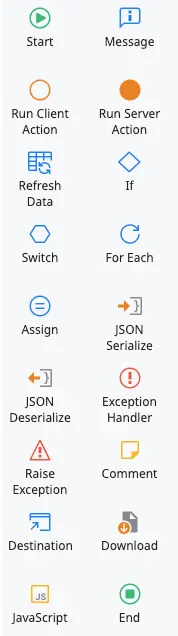
Actions in OutSystems are defined in the Action Flow, using nodes and arrows to represent logical steps to execute. There are some similar concepts from JavaScript that you’ll recognize:
- Control flow nodes like “If,” “For Each,” and “Switch”
- Variable assignment with “Assign”
- Alerting the user with “Message”
- “Raise Exception” and “Exception Handler” for throwing and managing errors
- The ability to call other client and server actions within the flow
All actions have one start node and one or more end nodes.
In the “SaveDetail” logic flow, the following steps occur:
- The flow starts
- There is a conditional check IF the form is valid
- IF the return value is FALSE, a message is shown to the user and the flow ends
- IF the return value is TRUE, the “VenueCreateOrUpdate” server action is called
- Then, the user is redirected to the “Venues” screen
You can imagine a similar function in JavaScript would look like this:
```
function saveDetail(){
let isFormValid;
// logic to manually check for form validity
if (isFormValid) {
venueCreateOrUpdate(currentVenue);
window.location.href = "http://www.myapp.com/venues";
} else {
alert("Please correct form before submitting");
}
}
```
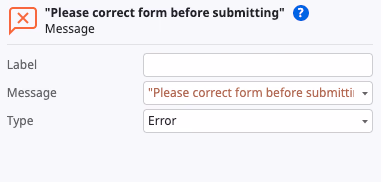
Action flows make it easy to visualize how a function will execute. Each node can be selected in the Action flow editor to customize and configure as needed. Click on the “Message” node and update the text displayed to the user in the node properties box. Also, change the Message type from “Info” to “Error."
In addition to dragging nodes onto the editor, you can also select the blue dot on any flow line to add more nodes, or even see AI-generated suggestions for your flow.

Update the action flow to show a success message after the “VenueCreateOrUpdate” server action and publish to view your changes.
Congratulations, you’ve edited for your first action in OutSystems!
Form validations
You may have noticed that the flow checks for “Form1.valid." In traditional development, you may spend a lot of time writing validations for the different fields on a given form. OutSystems makes this process much easier with built-in form validations.
Double-click on the “VenueDetail” screen in the Interface tab, then select the “Save” button to view its properties. You’ll see that “Built-in Validations” is marked “Yes” under the event properties. This means that OutSystems will automatically validate that all mandatory fields are completed and have the correct data type.
If any of the fields are invalid, the “Form.valid” property will be set to false. This property can be checked in action flows. OutSystems will automatically display error messages next to the invalid fields, as well as any custom error messages defined in your action flow. In our application, an invalid form save looks like this:
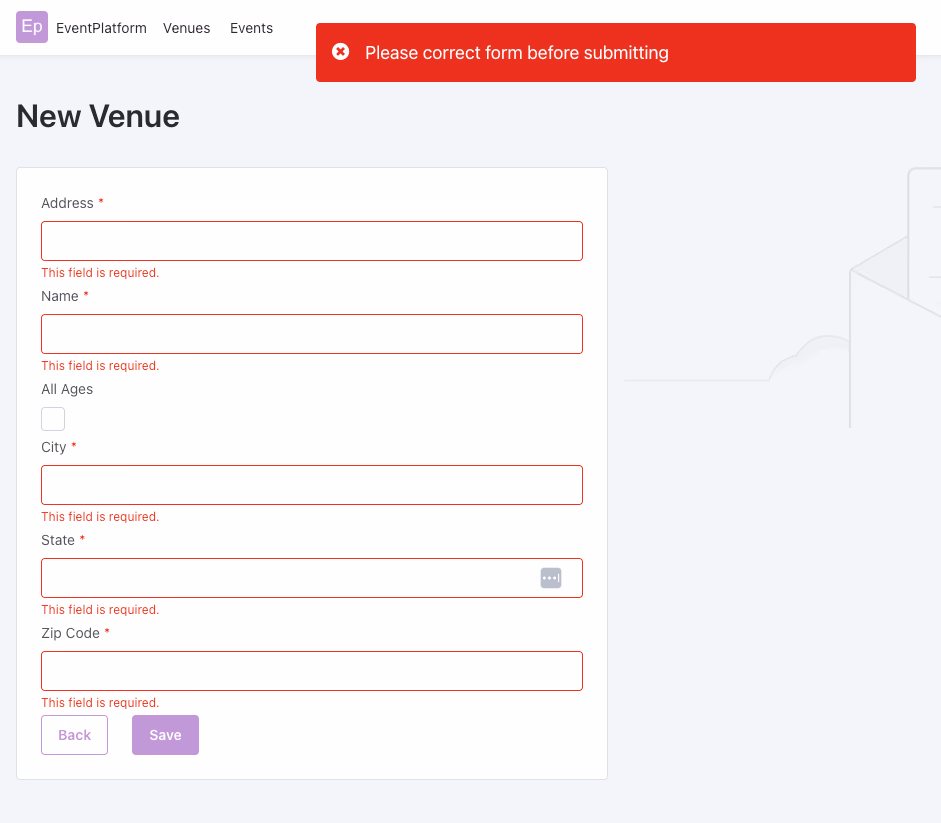
You can learn more about built-in and custom form validations in OutSystems in the documentation.
Events
I mentioned earlier that screen actions are typically triggered by events related to widgets in the UI. Let’s learn more about these types of events and how we can update the UI based on user interaction.
In the last blog post, we created a Block to display the details of a venue in our Venues screen. However, right now the Block does not update when a venue is selected. Let’s use events and actions in OutSystems to make our UI reactive.
First, let’s create a new local variable on the “Venues” screen to keep track of the selected venue. Right-click on the “Venues” screen in the Interface tab and select “Add Local Variable." Name the variable “SelectedVenueId," and OutSystems will automatically assign the “VenueIdentifier” data type.
Next, select the “VenueDetails” block on this screen and change the input parameter from “IntegerToIdentifier(5)” to “SelectedVenueId.”
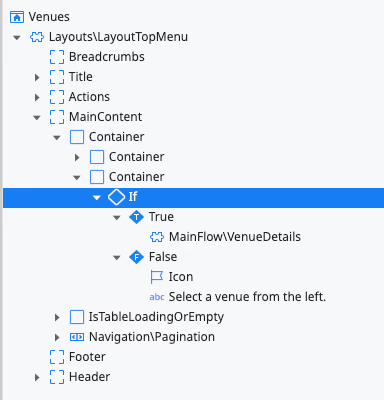
Additionally, enclose the “VenueDetails” block in an “If” widget and display some text when “SelectedVenueId” is null.
On click events
Our next step is to update the “SelectedVenueId” variable whenever a venue is selected from the list. You may have noticed that interactable widgets have an “Events” section in the Properties tab. This is where we can define events and handlers to trigger actions in our application.
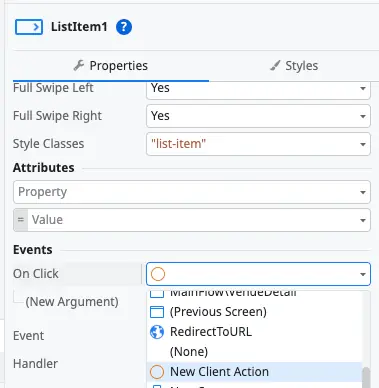
In the “Venues” screen, select the “ListItem” widget. Then in the drop-down next to “On Click” in the “Events” section, select “New Client Action."
This will automatically open the action flow editor. Name this new action “SelectOnClick." Drag an “Assign” node onto the action flow.
Rename the Assign “SelectedVenueId." In the “Assignments” section in the node properties, assign “SelectedVenueId” to the value “GetVenues.List.Current.Venue.Id.”

Publish your changes. Now, when you click on an item in the Venues list, the block will display the venue details.
But wait! It only works for the first click. Let’s make this block truly reactive using another common event in OutSystems.
On parameters changed events
Currently, our “VenueDetails” block will display the value of “SelectedVenueId” at the time it is instantiated. However, the block does not know when the value of “SelectedVenueId” changes. We can easily fix this using the “On parameters changed” event in OutSystems.
Double-click on the “VenueDetails” block to open it. In the “Events” section of the properties tab, select “On.”
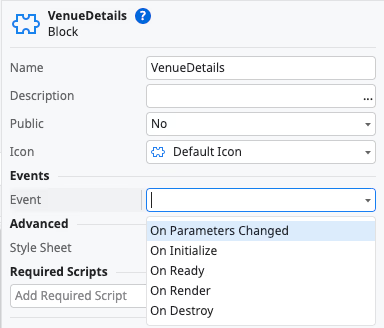
This will again open the action flow editor to create a handler for this event. This event fires every time an input parameter the block is changed. As a reminder, our block has an input parameter “VenueId” that is used in the “GetVenueById” aggregate.
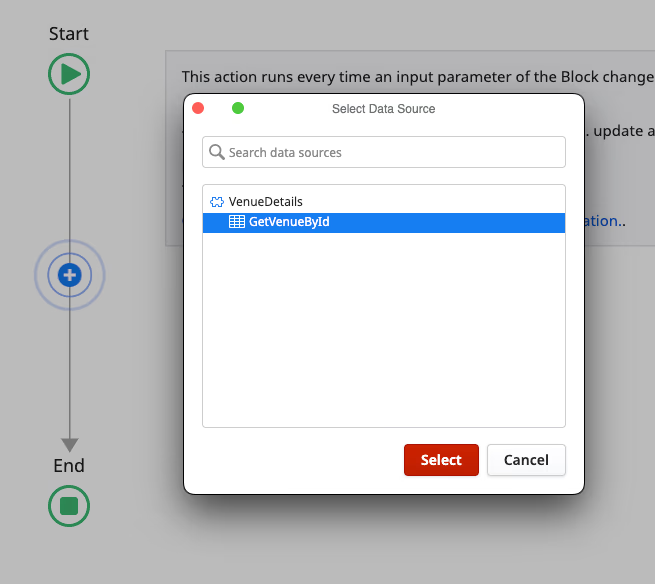
Our app should refresh the results of “GetVenueById” whenever the “VenueId” is updated. We can define this behavior in the `OnParametersChanged` action in our block.
Drag the “RefreshData” node onto the action flow. A modal will pop up to select the data source that will be refreshed. Select “GetVenueById.”
Publish your changes, and now your venue list is fully reactive! By combining the power of events and actions in OutSystems, you can easily build interactive user interfaces.
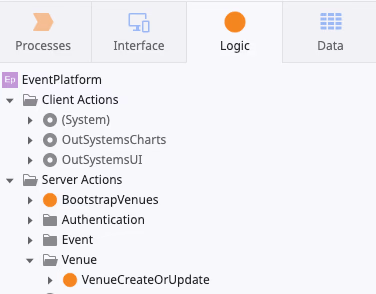
Server Actions
So far, all the actions we’ve been working with have been on the client side. However, there are times when you need to execute pieces of logic on the server. Server actions are represented by filled orange circles and can be viewed from the “Logic” tab in Service Studio.
Let’s learn how to use a server action to work with the data layer of our application.
Updating data
You may remember from the data blog post in this series that OutSystems automatically creates CRUD operation actions when you create a new Entity.
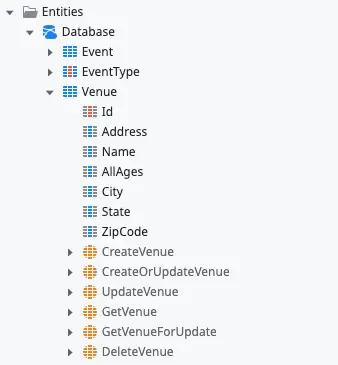
However, we cannot call these operations directly from the client side of our app – and for good reason! Instead, we need to use server actions to encapsulate logic related to data changes.
When OutSystems automatically built the “VenueDetail” screen, it also automatically created a server action to create or update a Venue entity. We saw this server action called from our “SaveDetail” screen action. In the “SaveDetail” action flow editor, select “VenueCreateOrUpdate” to view the properties.
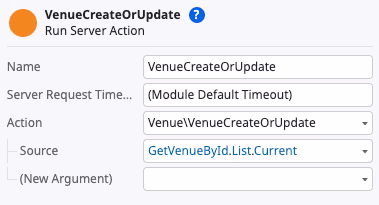
Here we can see that the server action has an input parameter of “Source." We are passing the current Venue entity as this parameter when running the action.
Now let’s take a closer look at the logic inside this action. Double-click the node on the action flow to drill down into the VenueCreateOrUpdate action.
Once the action flow editor opens, we can see in the sidebar that, in addition to the “Source” input parameter, there is an “Id” output parameter. This is the `VenueIdentifier` of the venue that was created or updated in the database.
We can also see that the server action is pretty simple – it calls the `CreateOrUpdateVenue` CRUD operation, and then assigns the `Id` output parameter to the return value of that CRUD operation.
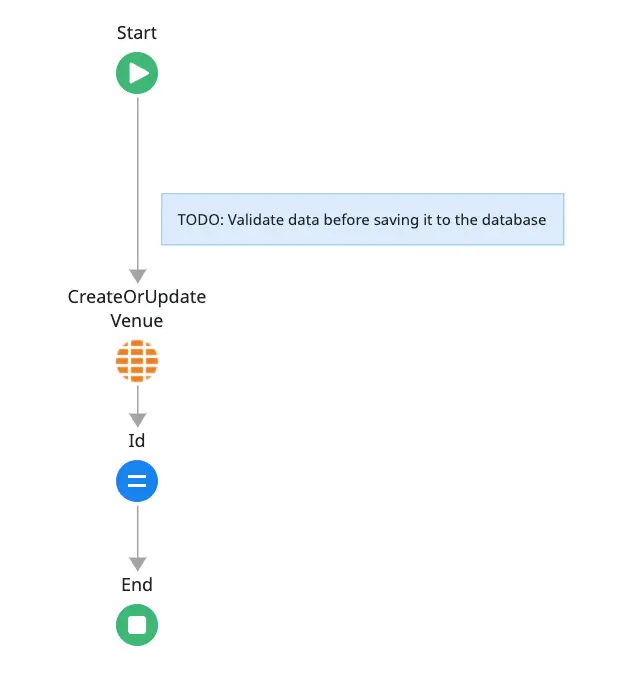
You’ll also notice the “TODO” comment that recommends validating the data before saving it to the database. Here is where you can perform additional business logic validation, such as ensuring a valid zip code, if needed.
Here, we can also validate that the user making the update is authorized using role-based security in OutSystems.
Role-based security
Because OutSystems is a full app development and delivery platform, it also provides user management for authentication and authorization. This means we can perform user-based functions right from Service Studio, without the need to integrate with a different platform or tool.
In the “Logic” tab, right-click on the “Roles” folder and select “Add Role." Name the new role “Admin." Now, when you expand this new role, you’ll see there are some built-in functions to check if a user has the admin role or to grant or revoke access to that role.
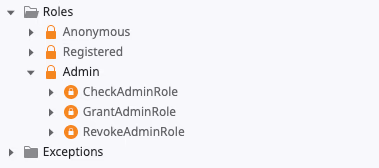
These can be used in actions to validate before performing sensitive operations like updating our data. In our “VenueCreateOrUpdate” server action, we can now use an “If” widget to check if a user is an admin before proceeding with the database update by setting the “If” condition to :CheckAdminRole().”
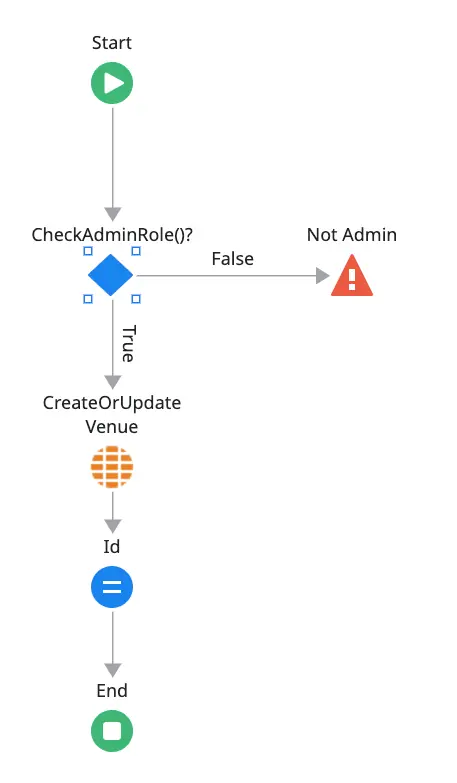
If the user is not an admin, we can raise an exception. Learn more about exception handling in the OutSystems documentation.
Next steps
This has been a crash course on logic in OutSystems! I encourage you to use the free OutSystems personal environment to create an app and explore these concepts yourself. OutSystems is best learned hands-on due because it’s visual.
Based on what you’ve learned so far, you can now accomplish quite a lot in OutSystems. I recommend attempting the following on your own:
- Add some data to your Events table manually in Service Studio or using an Excel spreadsheet
- Create screens automatically from the Event data type
- Customize the Events screen using widgets and blocks to creatively display the list of Events
- Add an “Edit” button to the VenueDetails block that redirects to the “VenueDetail” page and allows editing the selected venue
- Add custom validations to ensure that a new event is not at the same time and venue as an existing event
- Add role-based security to your EventDetail page
Be creative and expand the app to learn more about OutSystems. Sign-up for your free personal environment and get started today.
