Application Data Management
This blog is the first in a series called OutSystems 101, and its objective is to help developers who use other technologies like React, Angular, or .NET quickly learn core concepts in OutSystems. It’s based on my experience learning OutSystems and “translating” my existing web development knowledge to its visual, low-code language.
If you think that low-code is only for non-developers, think again! I was surprised to discover just how much engineering knowledge is required to build quality apps in OutSystems. The good news is that OutSystems removes the tedium of app development (think framework configuration, remembering syntax quirks, and repetitive boilerplate), so you can focus on making strategic technical decisions to build the right app for your users.
Knowledge of programming concepts is helpful for this series. If you would like a more comprehensive deep dive, OutSystems provides a robust library of training materials for free online here.
Throughout the series, I’ll show examples based on a sample events platform application. If you’d like to build along, create a free OutSystems account, set up a personal environment, and install the development environment, Service Studio. (Check out the Getting Started guide here.)
Data in OutSystems
Data is the foundation of any application, so it’s important to get your data model and interactions right. Fortunately, OutSystems makes this easier with a visual development environment and built-in methods. If you’re new to OutSystems, this guide will help you get up and running with basic data concepts to successfully build an app.
Under the hood, OutSystems uses SQL. This guide will reference some of the equivalent SQL concepts to provide some context for those already familiar with SQL, but knowledge of SQL is not required! This is one of the benefits of OutSystems – because the platform generates code in common technologies, you can use the technical skills you already have to translate concepts, or learn the OutSystems approach.
Entities
We’ll start with the building block of data in OutSystems: Entities. An entity represents an object that corresponds to a business concept for your app. For example, an e-commerce app may have Products, Orders, and Customers. Each of these could be an entity in OutSystems. For those familiar with SQL, an entity corresponds to a database table.
Each entity has attributes, or properties, that contain additional information about the entity. These correspond to the concept of columns in SQL. Attributes must have a set Data Type, which can either be a primitive type like Text or Integer, or a reference to another entity. Attributes can be set to mandatory if needed.
The best way to understand entities and relationships is to see them visually represented in OutSystems, so let's create our first entity.
Creating an entity
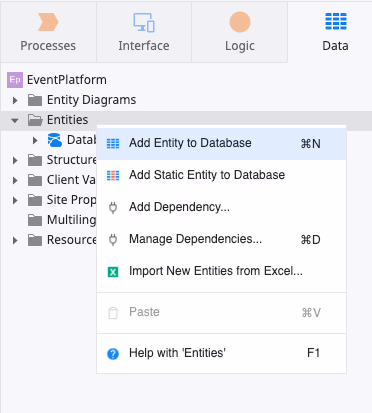
Everything related to the data of your application is accessible from the “Data” tab in Service Studio. Here you see a folder named “Entities.” Right-click and select “Add entity to Database” to get started. We’ll name our first entity “Event.”
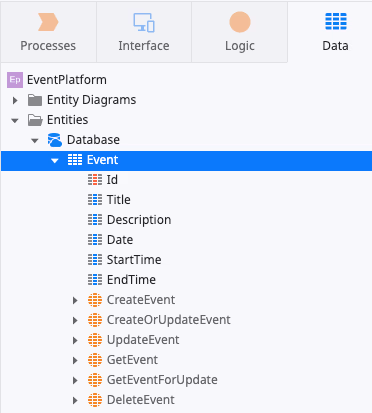
This creates a new table where we can define our entity attributes. By expanding the arrow next to our new entity, you’ll see a default Id attribute, as well as some built-in CRUD methods. (We’ll get to those later!)
Now you can right-click the entity and select “Add Entity Attribute.” We’ll add the attributes, or columns, and make sure each attribute has the correct data type. OutSystems infers the data type for you based on the name, but you can adjust that if needed. You can also mark if the attribute should be mandatory.
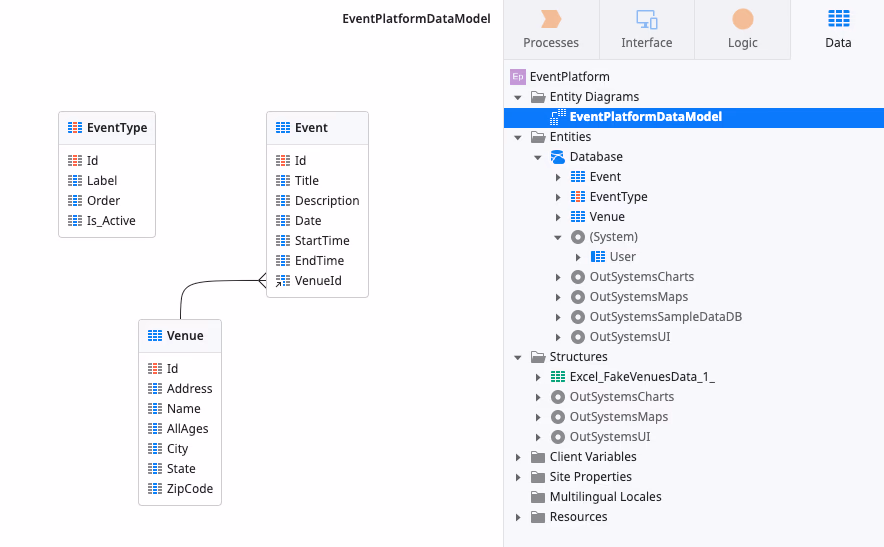
Here is our “Event” entity, with attributes for Title, Description, Date, StartTime, and EndTime.
I’ll do the same for a “Venue” entity, with attributes for Name, Address, City, State, ZipCode (all with a text data type) and AllAges (a boolean).
Relationships
Every event needs to have a venue. We can demonstrate this relationship by adding an attribute to “Event” that references a specific “VenueId.” This is called a Reference Attribute, and you’ll see that the data type is automatically inferred as “Venue Identifier” by OutSystems.
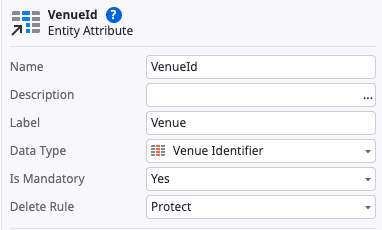
If you’re familiar with SQL, this is like adding a foreign key column to a table that references the primary key of another table. In this case, our Event entity is like the child table. The VenueId attribute on the Event entity is like a foreign key that references the primary key of the Venue entity.
Static entities
Static entities are read-only and are useful for holding predefined values that will not change. These are like static tables in SQL, and some examples could be role types, categories, or levels of priority. For our event app, each event should have an event type, but we want these to be predefined from the outset as either “meetup” or “workshop.”
So, we’ll create a static entity. Right click on the entities folder again and select “Add Static Entity to Database." Name it “EventType,” then right-click the Records folder and add two records, one for each of our event categories.
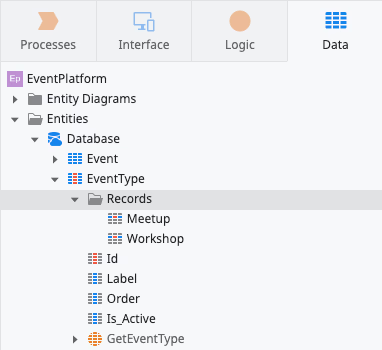
Because static entities are read-only, which means developers can add new records in the future, users will not be able to update it from your app. We can add an entity attribute to “Event” called “EventTypeId” that references our new static entity. This is exactly what we just did for VenueId.
Now that we have entities defined, we can start adding data to our app.
Bootstrapping data
OutSystems enables you to manipulate data records in Service Studio. Simply double-click any entity to view, edit, and create new rows. But, the easiest way to set your app up with initial data is using the spreadsheet upload option. OutSystems will automatically map your columns in Excel to the attributes in your entity and add the rows for you.
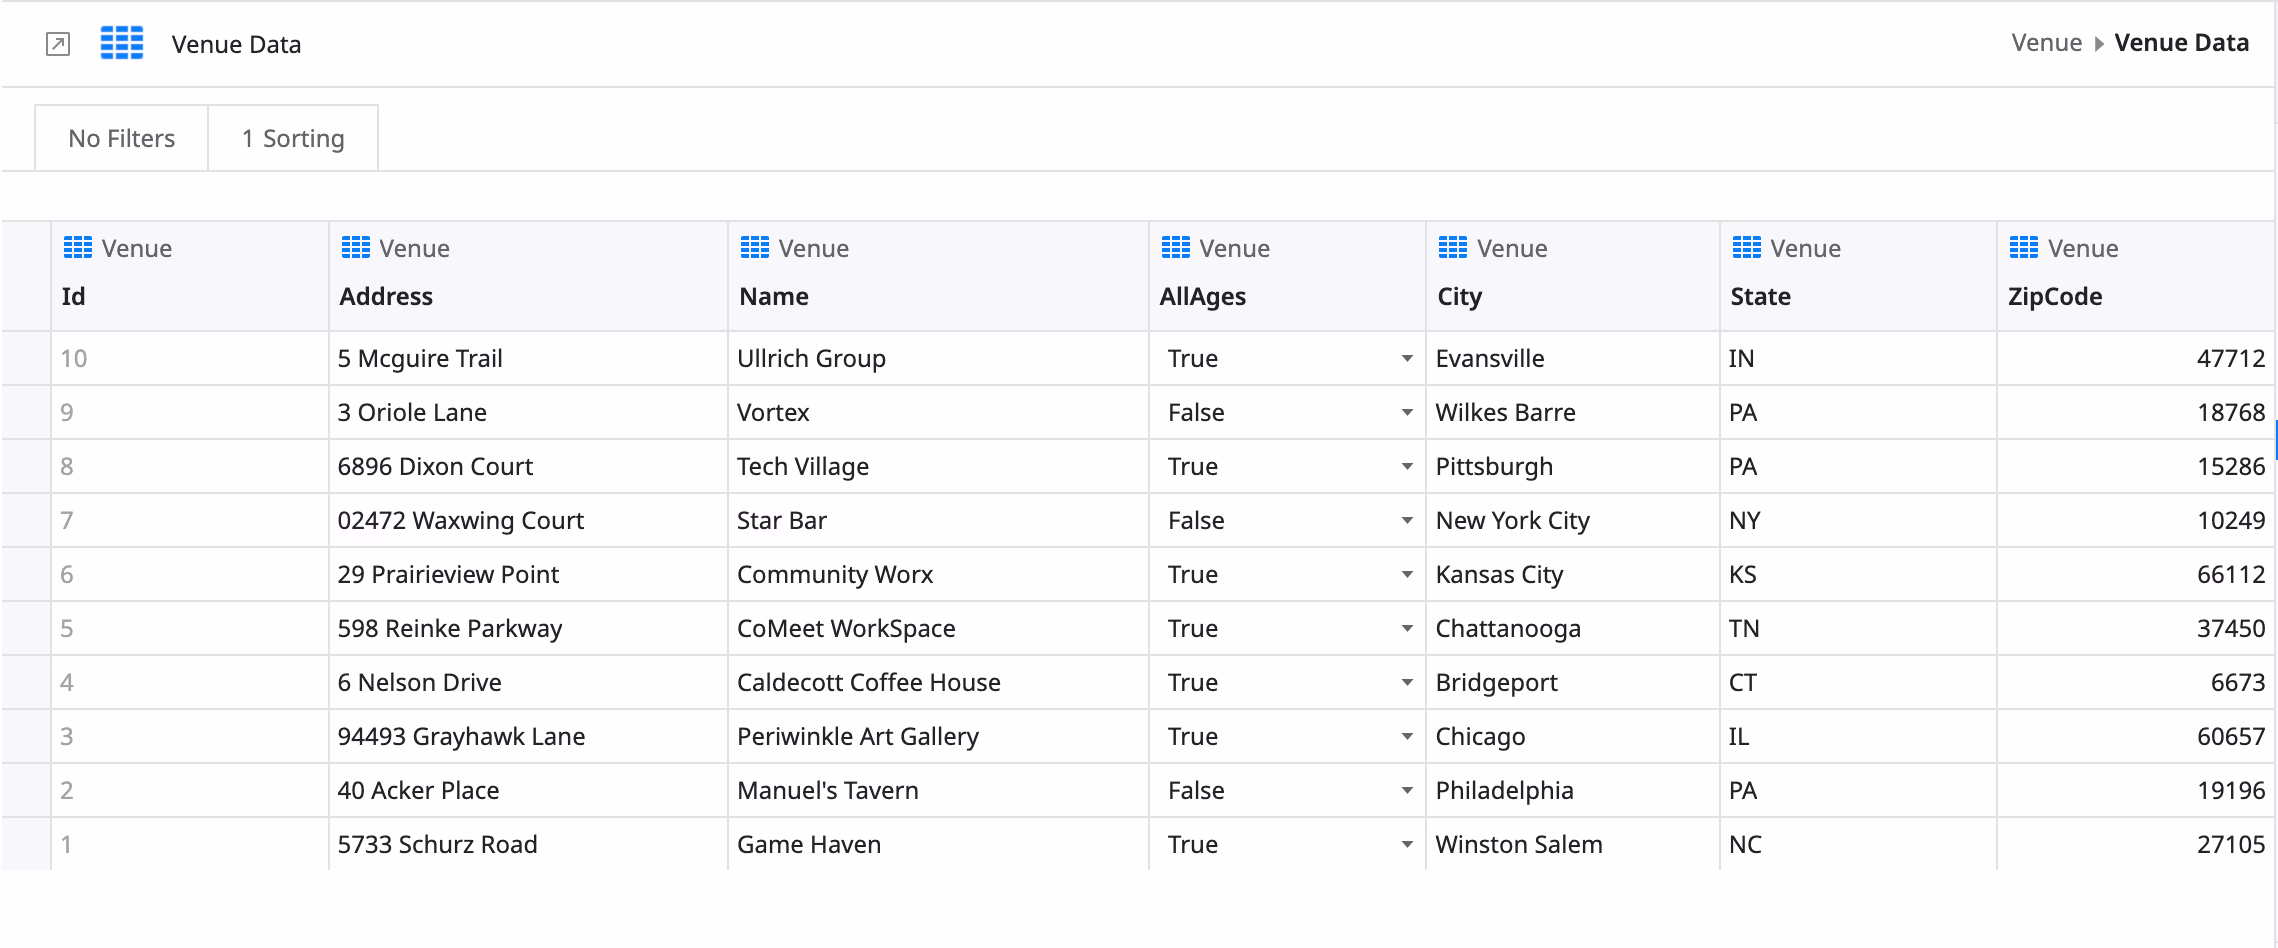
I’ve generated some fake venues to populate our Venue entity and get our app started. To upload, right-click on the Venue entity, navigate to “Advanced,” and then “Create Action to Bootstrap Data from Excel.”

Confirm the mappings, click the green Publish button, and you’ll now be able to see the rows populated by double-clicking on the Venue entity.
Now that we have some data, let’s do something with it!
Displaying data on screens
We won’t get into building user interfaces too much in this post (that’s coming soon!). However, I do want to demonstrate the relationship between your data model and the UI, as well as how easy it is to generate a visual representation of your data for your app’s end users.
Drag-and-drop
OutSystems can automatically generate screens (as in pages) based on your data model. This has been a game changer for me coming from traditional code, where scaffolding out pages was some of the most tedious parts of building an app from scratch.
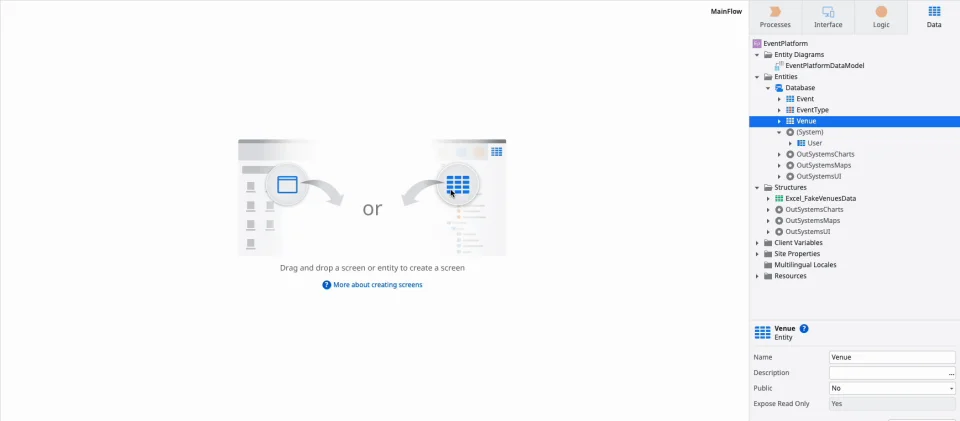
First, navigate to the Interface tab in Service Studio. You’ll see an expanded UI Flows folder with a “MainFlow” inside. Again, we’ll explain more about UI in OutSystems in the future, but for now double-click where it says “MainFlow.” This will update the main window in Service Studio with instructions prompting you to “Drag and drop a screen or entity to create a screen.”
We’ll do the second option! Click back to the Data tab, click and hold the Venue entity in the list, and drag it onto the screen.
Double-click on the newly-created Venues screen. In the bottom half of the right sidebar, check the “Anonymous” option under Roles. This will let you view the screen in your browser without logging in to the application. (Note: This is only recommended for sample apps, for security reasons, it’s best to require users to log in for production.)
Click the green Publish button, and then “Open in browser” once the button changes to blue.
In the browser, we can see our Venues list populated with the data! OutSystems creates the UI components to display, search, and even paginate data.
Back in Service Studio, check “Anonymous” under Roles for the VenueDetail screen, just like we did for the Venues screen. Publish again and open in the browser. Now, click on either the “Add Venue” button or the name of any venue in our list.
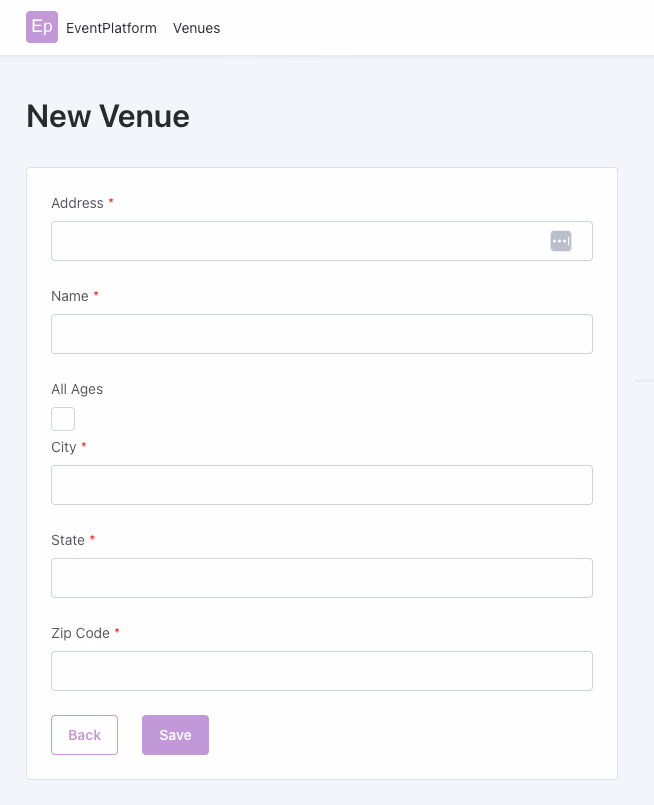
This is the UI for editing existing and adding new venues. No more repetitive building of forms over and over! OutSystems even handles built-in form validation based on your data model, enforcing types, and mandatory fields.
Queries with aggregates
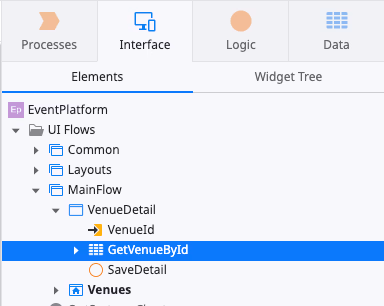
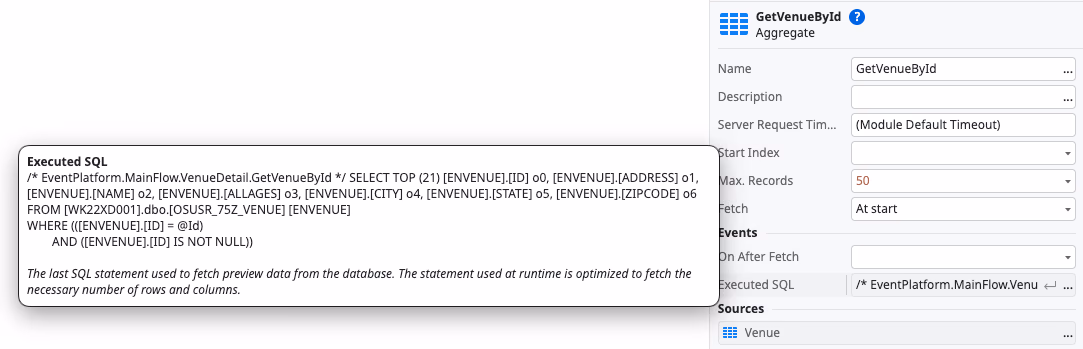
OutSystems uses what’s called Aggregates to create these screens. Aggregates are optimized SQL queries for fetching data from the database. If you expand the arrow next to the VenueDetail screen in the Interface tab, you’ll see a “GetVenueById” item with a grid icon. This is the aggregate we are using to query for the specific venue.
Double-clicking the aggregate opens a visual query editor. Here, you can explore the query sources, filters, and sorts. You can also set test data to validate the query returns what you expect. I encourage you to adjust some of the different values to better understand the relationship between the query builder and your data.
In the bottom of the right-sidebar, you can also see the executed SQL query generated by the aggregate.
We can also get information about the returned query, such as how many items were returned. Let’s update the Venues list screen to display how many venues there are.
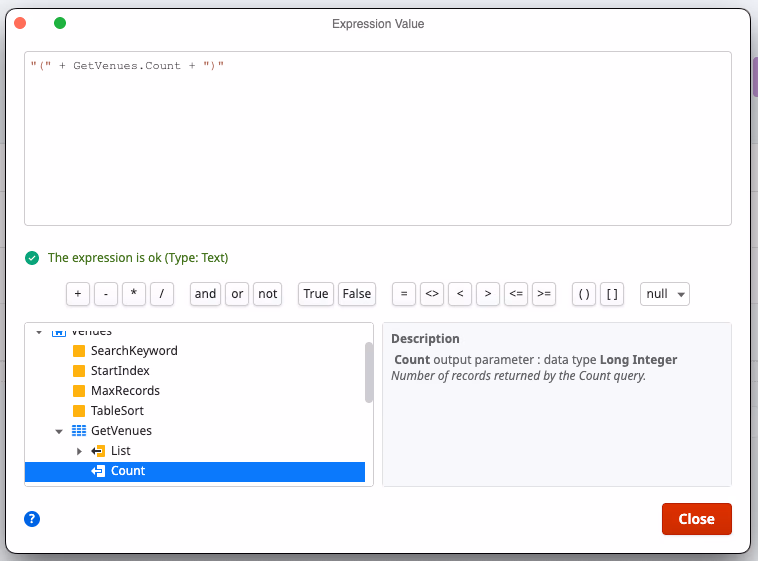
Double-click the Venues screen to open the UI editor. In the left sidebar, you’ll see an option that says “Expression” with an x/y icon. Drag and drop this item right next to the title that says “Venue List” on the screen. This will open the Expression Editor.
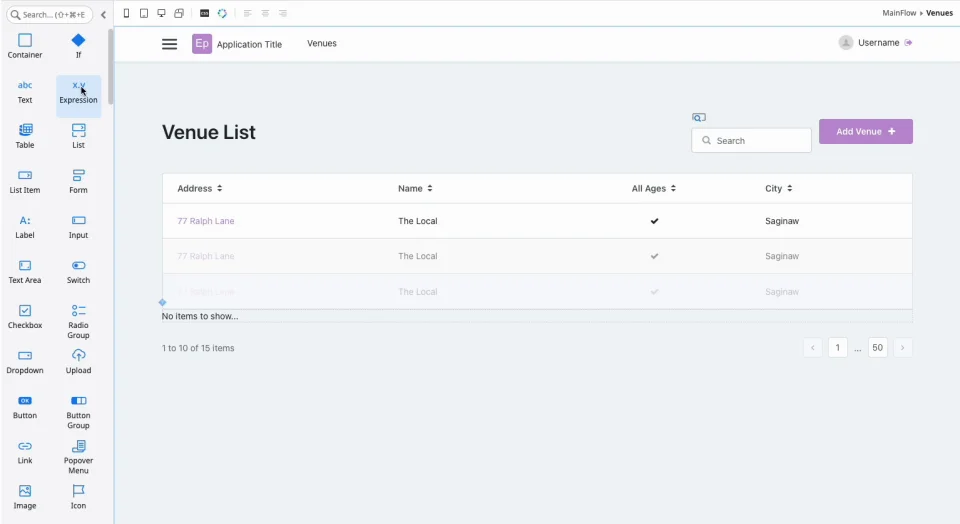
In the Expression Editor, the available data from your application is in a tree format. Expand the “GetVenues” aggregate and select “Count.” Use this GetVenues.Count value to create an expression that shows the count value between parentheses using the JavaScript expression syntax you’re used to.
Publish again and you’ll see the count in the browser next to the title. Aggregates are very powerful, and can be used to perform more complex filtering, joins from multiple data sources, and even calculated queries that generate attributes such as sums or groups of data rows.
Dig deeper into aggregates in the documentation here, and we’ll leverage them more in future posts in this series.
CRUD operations
One other data feature of OutSystems that’s important to mention are the built-in CRUD operations for all entities. You may have noticed these when we first created our Event entity.

CRUD (Create, Read/Get, Update, and Delete) operations are standard operations for working with data in an application. These are automatically generated by OutSystems and can be used in the business logic of your app.
When we generated the Venues list and detail screens using our data model, OutSystems also created logic that uses these CRUD operations to add or update new venues to our database. We can trace this flow to see how the data moves across the full stack of our app.
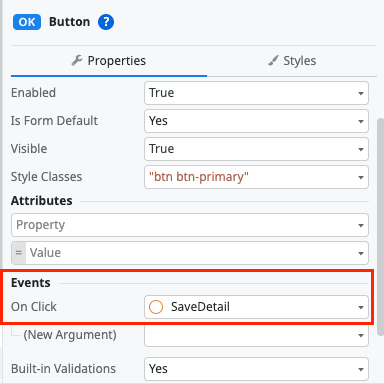
In the Venue Details screen, the “Save” button on our form has a click handler that runs “SaveDetail.”
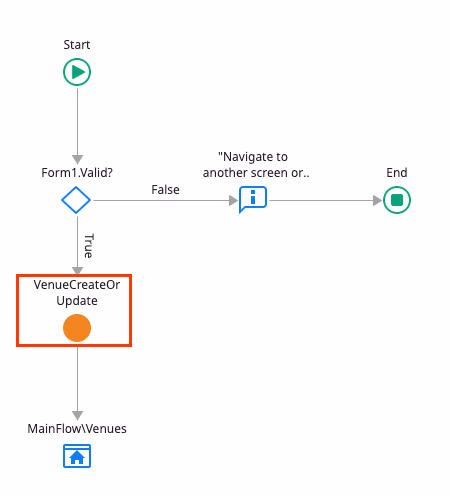
Digging into this “SaveDetail” Action (you can think of it like a client-side JavaScript function for now), we can see it leverages something called VenueCreateOrUpdate. Again, don’t worry too much about understanding this flow; the important thing to know is that our click handler calls a “function” SaveDetail, which then makes a call to our server using VenueCreateOrUpdate.
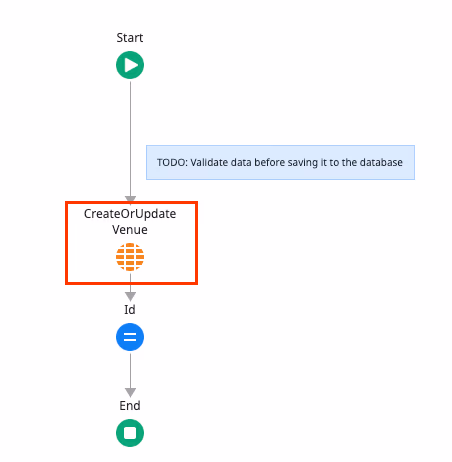
Finally, on our server, within the “VenueCreateOrUpdate” action, OutSystems is using the built-in CreateOrUpdateEvent operation to actually write the change to our database.
Having a solid understanding of your data model and how it’s used across the OutSystems app is important to ensuring your app has a strong data foundation early on. You can view the relationships between your data entities at any time in the “Entity Diagrams” section of the Data tab.
Next steps
This has been a crash course on Data in OutSystems! I encourage you to use the free OutSystems personal environment to create an app and explore these data concepts yourself. OutSystems is best learned hands-on due to its visual nature. You can use this Excel file with Venue data, or build something yourself from scratch!
Stay tuned for more posts in this series – the next covers UI Components in OutSystems.


